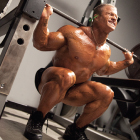
 All strength training starts with the full squat. Not the quarter- or half-squat. Many instructors shun full squats, stating that they make the glutes too big or, more typically, they’re bad for the knees. Total nonsense. While full squats most certainly do involve the glutes, they do so in a good way, working them proportionately so they stay in balance with all the other groups around them. Strong glutes are important to all athletes because they’re a part of nearly every movement made by the body..
As for the complaint about the knees, it has been proven again and again that the full-range movement is less damaging to the knees than partial squats. The reason is simple: When you stop a squat above parallel, the total responsibility of halting the descending resistance falls on your knees; however, once the thighs go below parallel, even slightly, the downward stress is handled by the very strong hips, quads, adductors and hamstrings. So the more delicate knee joints are relieved of having to withstand that downward pressure.
When done correctly, full squats are one of the safest exercises in all of strength training. Athletes sustain at least 10 times more injuries to the shoulder girdle, most of which are linked directly to the bench press, than they do from squats. Squatting also happens to be one of the easiest exercises to learn. The reason? It’s a natural movement. Just watch small children play. They’re continuously doing deep squats and doing them perfectly. The main reason that older bodies have some difficulty doing squats correctly in the beginning is that they have lost flexibility through the years—but by squatting, they can regain much of what they have lost.
Full squats are the first lift I teach all beginners—young, old, male and female. They’re the foundation lift for all other strength exercises, and because they’re so essential for long-term progress, they need to be given priority in any strength program. There are only a couple of situations in which I place another exercise first in a routine: when an athlete is lagging far behind on another primary exercise—I move the weaker lift to the front until the disparity of strength is rectified—and if an athlete expresses a desire to learn the Olympic lifts. In that case I give priority to the snatch and clean and jerk. High-skill lifts should always be done before more static movements, such as squats.
Knowing how to fix the bar on your upper back is the first step in learning how to squat. Because the bar causes pain in the back of the neck, many resort to wrapping a towel around the bar or using a “Kotex,” a round piece of rubber that goes around the bar. Not only do I discourage the practice, I do not allow it in any weight room I am in charge of. When the weights start getting very heavy, that towel or piece of rubber will twist and grind down into your upper back. Even without the protective devices, the athletes usually pull away from the pain, which places even more pressure on the spine.
The solution is simple. Just elevate your traps to create a ledge of muscle on which to cushion the bar. Even youngsters and women can benefit by doing that. Keep those traps elevated throughout the exercise, and you’ll be fine.
The closer your hands are on the bar, the better because that will let you grip the bar more firmly and control it when it’s across your upper back. Pull the bar down into your traps, and lock it in place so it doesn’t move at all.
Where you place your feet depends to a large extent on how tall you are. For most athletes the ideal foot placement is shoulder width with the toes turned slightly outward. Taller athletes, however, do better with a slightly wider stance. Think basketball and volleyball players.
Some have difficulty keeping their heels flat on the floor when they squat low. That’s due to a lack of flexibility, usually in the ankles. Put a small plate or block of wood under your heels when you squat, but do it only for a short period of time. Elevating your heels places your knees in a vulnerable position. Eventually, after doing many reps, you will gain the needed flexibility, and you can eliminate the elevation device.
After you have locked the bar firmly on your back and stepped out of the squat rack, take a moment to tighten every muscle in your body, from your feet to your neck. Pull your shoulder blades together and tense your lumbars. Keep in mind that the squat is as much a back exercise as it is a leg movement. Do not let your back relax at all during the execution. If you do, the bar will move out of the proper line and make the lift much harder to complete.
As you start the squat, think in terms of pulling the weight down with you as you descend to the low position. Make the bar become part of your body. Go as low as you can while staying extremely tight. While you may not be able to hit rock bottom right away, make sure that you at least break parallel—so you’ll be working your glutes, hips, hamstrings, abductors and adductors along with your quads.
While you’re learning the technique for the back squat, do each set deliberately so you can pay attention to the various keys. Once you’re comfortable with your form, it’s time to start exploding out of the bottom and driving the bar in the exact line you’re seeking. If you drive the bar too far forward or backward, that attempt will be lost. With practice it will look as if you’re squatting in a Smith machine, with every rep being exactly the same.
Should you look up or down? Neither. Your head should be allowed to float freely on the top of your spine. Some like to look up when they erupt out of the bottom, and that’s fine—just as long as it isn’t extreme.
Stand up, take a couple of deep breaths, make sure the bar is where it should be and your stance is correct; take another breath, and do the next rep. Hold your breath throughout the lift. If you breathe, the muscles in your diaphragm will relax, and that will reduce your power base.
I recommend five sets of five until you’ve established a solid strength foundation; then you can start doing triples, doubles and singles along with the fives. Fives enable you to widen your base and also let you concentrate on your form.
There are several things to avoid when squatting. The number-one no-no is rebounding out of the bottom. That’s just common sense. If you continually bounce out of the bottom, you’re going to aggravate not only your knees but your back, hips and ankles as well. If this is a habit you have difficulty breaking, start doing halting squats, where you pause at the bottom for a full second. You also must avoid rounding your back. Some is okay, but excessive rounding will eventually prevent you from handling heavy weights. Concentrate on keeping your torso erect and your back extremely tight. Should you find that your knees are turning inward during a heavy attempt, that’s telling you that your adductors are relatively week. Check out this column in the October ’13 issue for more on that.
If you aren’t squatting, it’s time to start. Master the king of lifts, and all the other parts of your body will get stronger. That’s not a conjecture, it’s an established fact.
—Bill Starr
Editor’s note: Bill Starr was a strength and conditioning coach at Johns Hopkins University from 1989 to 2000. He’s the author of The Strongest Shall Survive—Strength Training for Football, which is available for $20 plus shipping from Home Gym Warehouse. Call (800) 447-0008, or visit www.Home-Gym.com.









You must be logged in to post a comment Login